Introduction
This animation permit me to study and discover Maya dynamics tools and expressions scripting. I work on it a bit less than 1 month.
Used softwares :
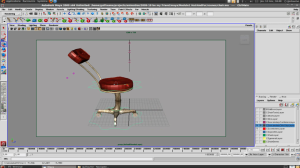
- Maya 2009 : Rigging, Dynamics, Animation, Rendering
- Blender 2.5 : Modeling, Compositing, Video editing
Character Setup
This stage has been the longest one of this production. Rigging creation for the chair needed lots of researches and tests to insert correctly dynamics tools with constraints (squash and stretch skeleton for example). Preparation (researches, technical studies, tests) needs 2 weeks. This animation permit to explore lots of tools in Maya for the Character Setup : dynamic rigging thanks to Hair, complex mathematic expressions to automate some tasks, complex uses of deformers.
The goal of this rigging is to make animators work more simple.
Animation
Thanks to the rigging quality, animation has been really simple to make. Less than 2 days to create it. Every secondary animations (deformations, rebounds…) are generated automatically with scripted expressions, dynamics tools (Hair)…
Render & Lighting
For this stage, I try to optimize render time. Lots of things has been made in post-production. The scene has only 3 lights (one with raytraced shadow). 2 layers are rendered :
- Color layer render color, shadows, specular. 2 pass are linked : The 3D Motion Vector and the Z Depth
- AO Layer which render only Ambient occlusion
Each image is rendered in 30 seconds (on Q6600 2.4Ghz, 4Go of RAM).
Post-Production
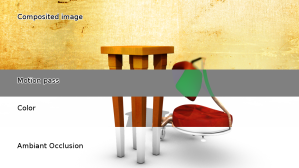
Compositing is a really important stage for the final render quality. In Maya 4 images are created after a render : The render itself (objects are rendered with their shadow on a white background), the Ambient Occlusion, the Motion Pass and the Z depth. No motion blur. Compositing permit to create the finale image from these 4 images.
For better animation quality, motion blur uses is really nice. Unfortunately, mental ray one is inappropriate for animation because it is very slow to render. That’s why the 3D Motion Vector pass is saved after the render. From this pass, a blur is generated with the compositing. It take less than 2 second to be created.
Then, color and Ambient Occlusion are mixed for better contrasts shadows. Compositing render take less than 3 seconds.
Downloads
- Technical paper (French)
- Creative document (French)


Tell us what you think